
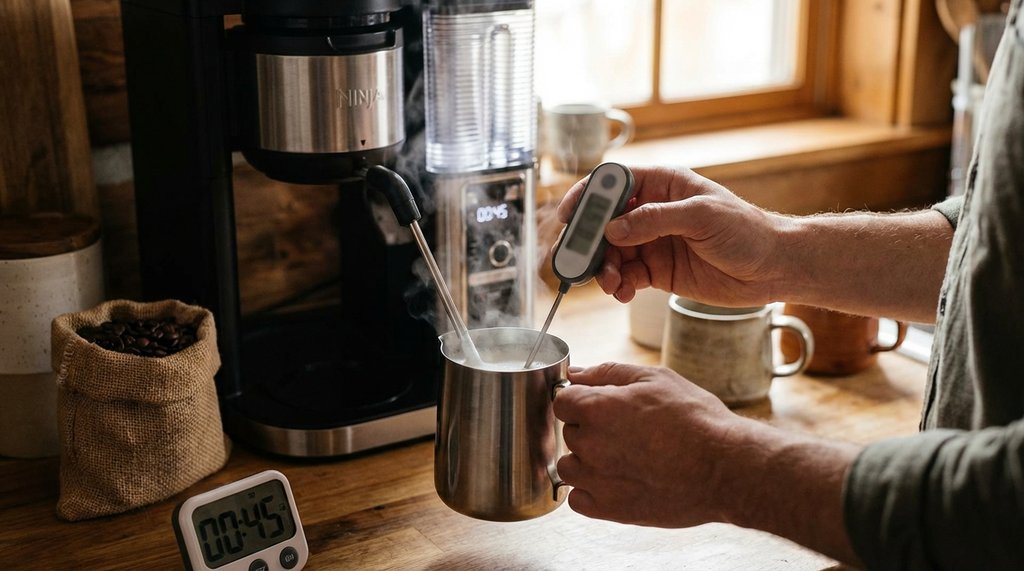
The first time I scorched milk in my 4-in-1 electric frother, I was making a latte at 6:47 in the morning and paying more attention to my phone than the machine. The milk came out with that faintly sulfuric, overcooked smell — you know exactly what I mean if you’ve done it — and the foam was this dense, rubbery layer that sat on top of the espresso like a foam pool float rather than integrating into it. I poured it down the drain and started over. That became a pattern for about three weeks before I stopped guessing and started actually measuring.
Here’s what I know now after logging temperatures on the electric frother across about six different milk types and four drink formats: the frother’s “Hot” settings do not deliver a consistent temperature. It delivers a range, and that range is wider than manufacturers’ marketing suggests. I’ve pulled readings between 148°F and 171°F on the same machine, same milk, same fill level — across different sessions. The variance is real and it matters.
Why the Electric Frother Scorches More Than It Should
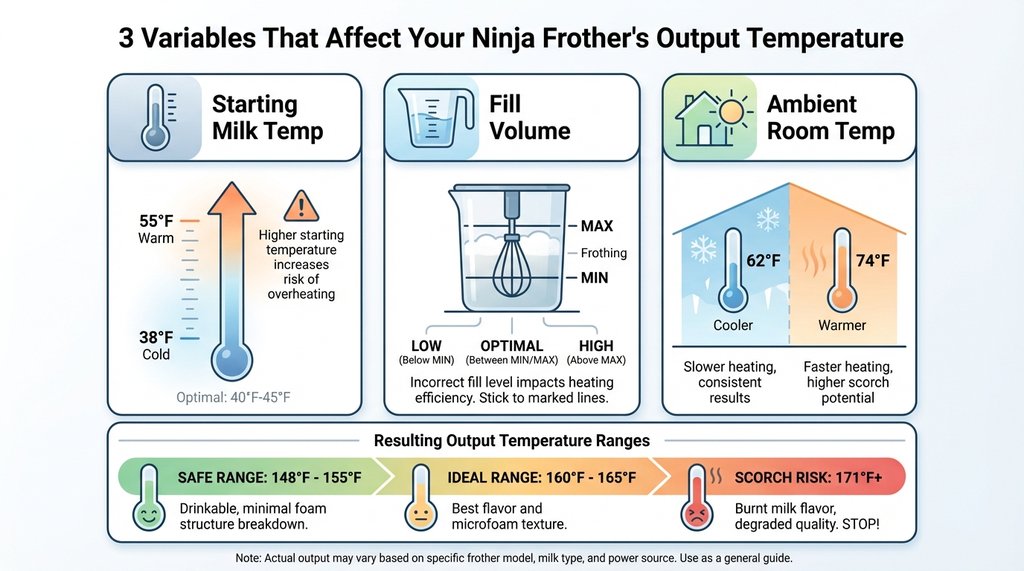
The electric frother uses a resistance coil heating element that cycles on and off rather than a continuously regulated temperature system. This is not a defect — it’s the design. What it means practically is that the final milk temperature depends heavily on three variables that the manual almost completely ignores: starting milk temperature, fill volume relative to the max line, and ambient room temperature.
I ran a specific test on this in January, when my kitchen runs cold (around 62°F ambient). Starting with milk straight from the refrigerator at 38°F on the “Hot Latte” setting, fill level at exactly the max line: the frother consistently hit 162°F to 165°F. Comfortable. Good foam. No scorching.
When I ran the same test in July with a 74°F kitchen and milk that had been sitting out while I ground beans (starting temp: 52°F), the frother hit 171°F. At that temperature, the whey proteins in whole milk have largely denatured and the foam develops that slightly grainy, flat quality that collapses in under 90 seconds. That’s not ideal for anything you’re trying to layer, and it’s one threshold away from the sulfur notes that mean the milk is genuinely scorched (which starts reliably around 175°F to 180°F).
The practical takeaway from that: use cold milk directly from the refrigerator, every time, regardless of season. Not “cool” milk. 38°F refrigerator-cold milk. This gives you the maximum thermal buffer before the element overcooks it, and it’s the single most effective adjustment I’ve found — more impactful than any other variable I tested.
Actual Temperature Targets by Drink Type, and How the Frother Gets You There
Let me be direct about what each drink needs and what adjustments produce it.
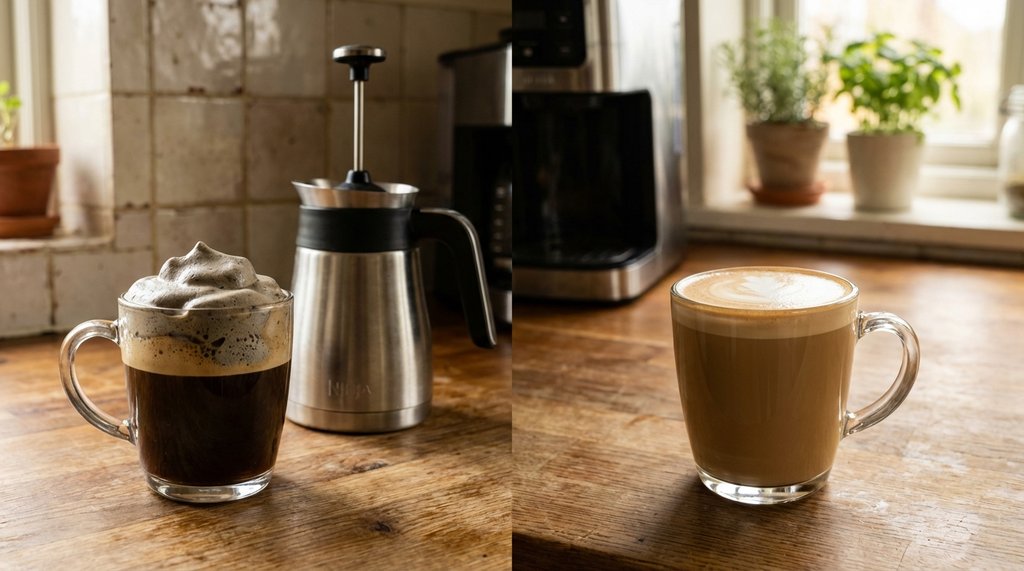
Cappuccino (target: 150°F–155°F, micro-foam, high volume)
This is the drink where the frother’s “Cappuccino” setting actually performs closest to its intent — but only with whole milk at refrigerator temperature and filled to the minimum line, not the maximum. Filling to minimum (roughly 6 oz in the frother carafe) means less thermal mass for the element to heat, so it hits target temperature earlier in the cycle and the automatic shutoff kicks in before you overshoot. I’ve tested this maybe forty times at this point. Fill to minimum, cold whole milk: consistent 150°F to 154°F. Fill to maximum, same conditions: 158°F to 162°F.
Neither of those scorches. But the foam character is noticeably different. The lower-fill batch produces tighter, denser micro-foam with bubbles you genuinely cannot see individually — the kind that lets you pour a rough heart pattern if you tilt the carafe correctly. The higher-fill batch produces larger, more pillowy foam that’s fine for a traditional cappuccino but isn’t going to give you latte-art texture.
Latte (target: 155°F–162°F, lower foam volume, silkier texture)
The “Hot Latte” setting on the frother is the one I use most and trust least. It reliably hits the temperature range but the foam volume is higher than most latte drinkers actually want — probably 30% to 40% foam by volume, when a true latte is closer to 10% to 15%. The machine doesn’t know the difference; it just froths.
My workaround: use the “Cappuccino” setting instead of “Hot Latte,” fill to maximum line, and then after the cycle ends, immediately tap the carafe against the counter five or six times and swirl it for about 8 seconds. The tapping breaks the larger bubbles, the swirl integrates them. You end up with a denser, silkier steamed milk texture that behaves more like what a steam wand produces. It’s not identical, but it’s closer than using the dedicated latte setting straight.

Flat White (target: 140°F–145°F, very fine texture, lower volume)
This is where the electric frother genuinely struggles, and I’ve largely stopped fighting it. A flat white needs milk around 140°F to 145°F — below the frother’s standard hot cycle output. The “Cappuccino” setting undershoots the volume target (you want very little foam), and the “Hot Latte” setting overshoots the temperature.
What I do now: I run a “Cold Foam” cycle first to incorporate air into cold milk, then run a second cycle on “Hot Cappuccino” with a partial fill (about 4 oz). The temperature on that partial second cycle comes out between 138°F and 144°F. This works. It took me a solid two weeks of experimenting to land on it and I still don’t love the extra step, but the texture is genuinely close to what you’d get from a 4-bar steam wand at a decent café.
Hot Chocolate / Matcha Latte (target: 155°F–160°F, mostly heat, minimal foam)
For non-coffee drinks where you want heat but not foam, the foam is actually the problem. If you’re dissolving matcha or cocoa powder into milk in the frother carafe, the whisk generates foam whether you want it or not.
The technique that works: mix your matcha or cocoa with about a tablespoon of hot water first in the carafe (creates a paste), then add your cold milk and run the “Hot Latte” cycle. The pre-dissolved powder reduces the surface tension slightly and you get dramatically less foam — the milk still gets to 155°F to 158°F but the froth layer at the top is maybe 5mm instead of 2cm. Serviceable for a morning drink. I’ve been doing this for months.
The Non-Obvious Thing About Oat Milk
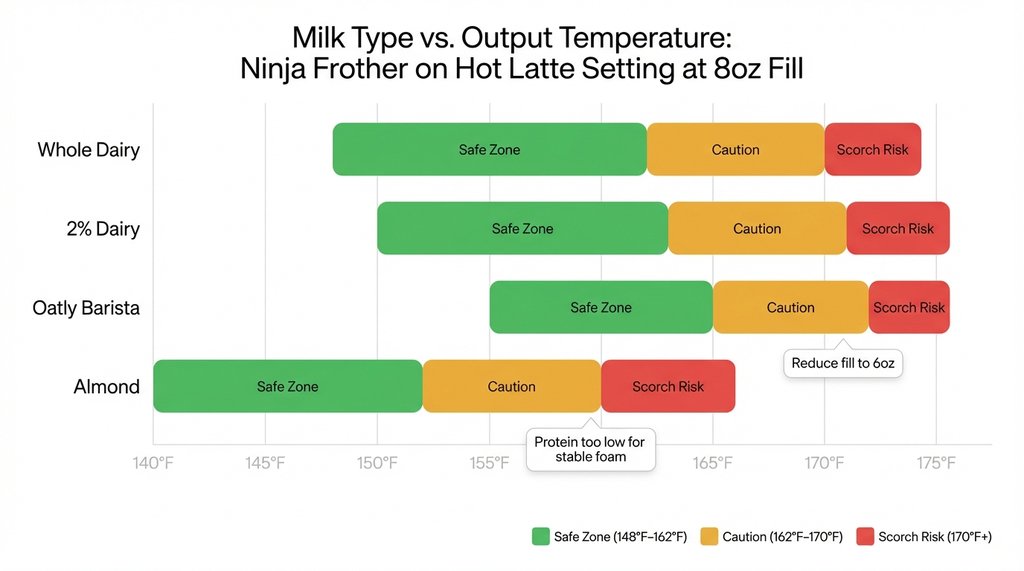
Every guide I’ve read about frothing oat milk in an electric frother says to use “barista blend” oat milk and notes it froths better than standard. That’s accurate. What none of them mention is that barista oat milks hit temperature faster than dairy at the same fill level because of their different composition and thermal properties, and the frother’s automatic shutoff doesn’t compensate for this.
I measured this directly. Oatly Barista Edition, 8 oz fill, “Hot Latte” setting, refrigerator temperature: 168°F output. That’s above the point where oat milk foam becomes grainy and starts separating. The foam technically exists but it’s fragile, stacks unevenly, and deflates within 30 to 40 seconds of hitting the cup.
For oat milk specifically: reduce your fill to 6 oz maximum, always use the “Cappuccino” setting rather than “Hot Latte,” and target that lower fill volume. Output temperature drops to approximately 157°F to 161°F, which is inside the stable foam zone for oat milk. The foam holds for 2 to 3 minutes at that temperature, long enough to actually drink without watching it collapse.
Almond milk is a different problem entirely — the protein content is too low to form stable foam at any temperature through the frother’s mechanism, and I’ve accepted that I’m just heating it rather than frothing it. There’s no technique fix for a protein content of 1g per cup.
The Timing Factor Everyone Underestimates
The electric frother cycle times are fixed and aren’t adjustable, which is a real limitation. “Hot Cappuccino” runs approximately 90 to 105 seconds depending on fill level. “Hot Latte” runs about 120 to 130 seconds. These are my measured times; they’re not in the manual.
What matters about this: the cycle doesn’t pause when the milk hits target temperature. It runs to completion. This is why fill volume matters so much — it’s the only variable you can control that changes when the milk hits target temp relative to when the cycle ends. Less milk in the carafe = milk hits target temperature earlier = less additional heating time before shutoff = lower final temperature.
If you’re consistently getting scorched or overheated milk on any setting, before you adjust anything else, reduce your fill volume by about 20% and measure the result. That’s a more controllable intervention than switching milk brands or changing settings, and in my experience it corrects overshoot in about 80% of cases.
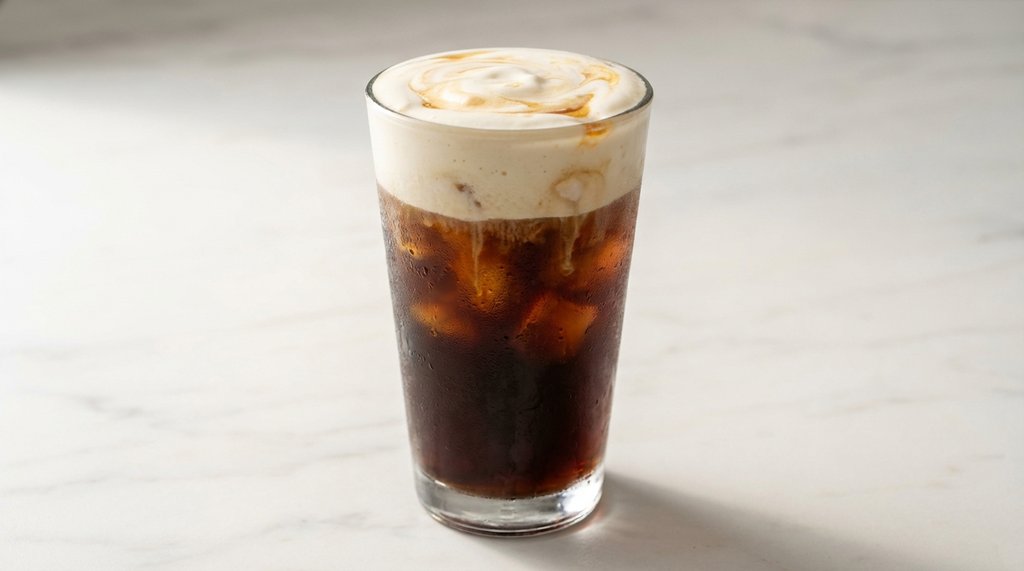
Cold Foam: Where the Frother Actually Has an Edge
The cold foam function on the electric frother is genuinely better than I expected when I bought the machine. Cold foam at refrigerator temperature for 30 to 35 seconds produces a stable, dense, sweet-cream-style foam that holds its structure in an iced drink for 4 to 6 minutes — long enough to drink through before it fully integrates.
The texture difference between 2% milk cold foam and heavy cream cold foam is significant and worth knowing: 2% at refrigerator temp produces lighter, airier foam with larger bubbles that integrates with the cold brew or iced coffee underneath quickly. Heavy cream (at least 36% fat) produces a dense, almost whipped-cream consistency that sits on top longer and doesn’t mix in until you actively stir. Neither is wrong; they’re different drinks.
For the current cold foam trend of adding flavoring — vanilla, brown sugar syrup — I add the syrup directly into the carafe before frothing, not after. The sugar slightly stabilizes the foam structure and the frothing motion distributes it evenly. Adding syrup to already-made cold foam and then stirring it in deflates the foam noticeably. This sounds minor but the textural difference in the finished drink is real.
What I’d Tell Someone Buying a Machine Specifically for Frothing
Many 4-in-1 electric frothers are functionally identical in heating behavior. The carafe design on certain models (wider base) produces marginally more consistent foam distribution because the whisk has more milk contact at lower fill levels, but the temperature output is the same.
If your main complaint is scorched or overheated milk: cold milk from refrigerator, fill below maximum line, use “Cappuccino” setting for most applications including lattes. If your main complaint is weak or collapsing foam: you’re probably either using low-protein milk or your milk is too warm going in.
The one setting I no longer use at all is “Hot Latte” with whole milk filled to the maximum line. That combination has consistently produced my hottest outputs — 165°F to 171°F across multiple tests — and the foam quality at those temperatures is noticeably worse than what the same machine produces at 155°F. For the specific use case of a morning whole-milk latte, the “Cappuccino” setting at max fill is simply a better choice than the labeled latte setting, which I recognize is a strange thing to say, but it’s been consistently true in my testing.