
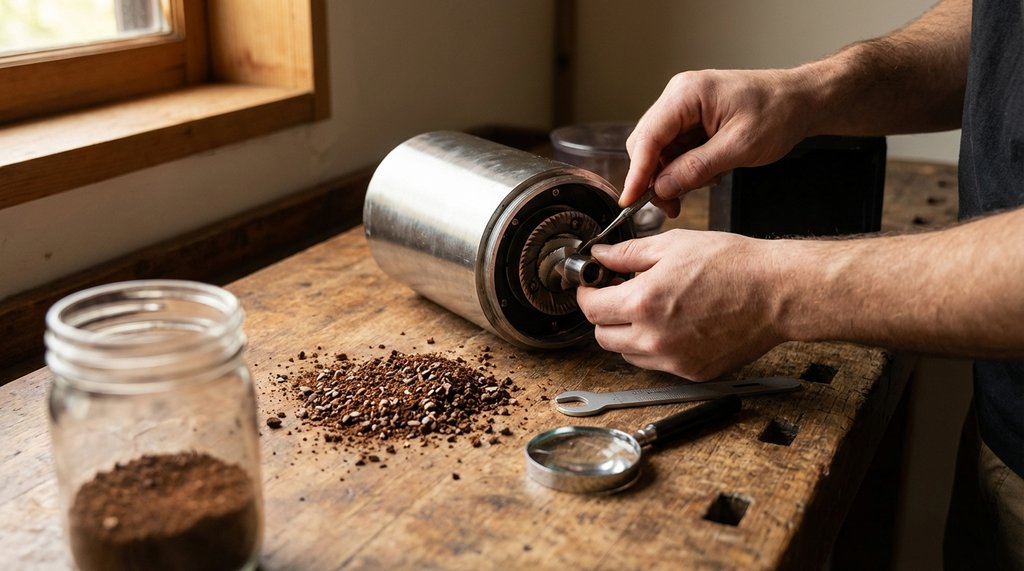
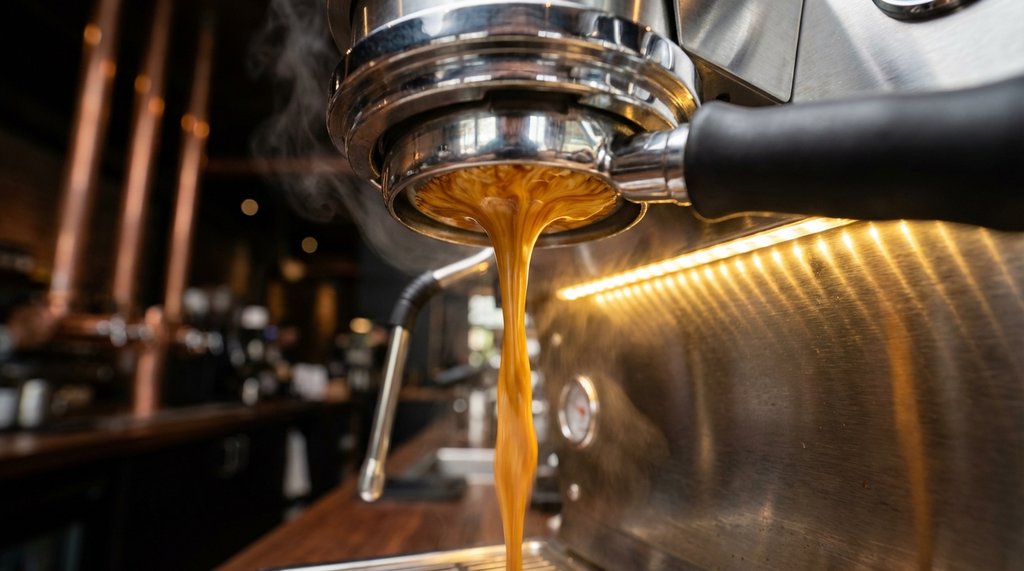
My DF64 had been pulling 9-bar shots at around 28 seconds with a 1:2.2 ratio, and every third shot was channeling. Not catastrophic channeling — the kind where a wire-thin jet splits from the puck halfway through — but the subtler kind you catch when you’re watching the bottomless portafilter and see two distinct flow patterns converge about 12 seconds in. I’d already chased distribution technique, basket choice, WDT method, and tamping pressure for two weeks before I finally accepted that the problem was upstream of all of that.
It was the burr alignment. Or more precisely, the factory alignment tolerance I’d been willing to accept.
Why Alignment Problems Don’t Announce Themselves
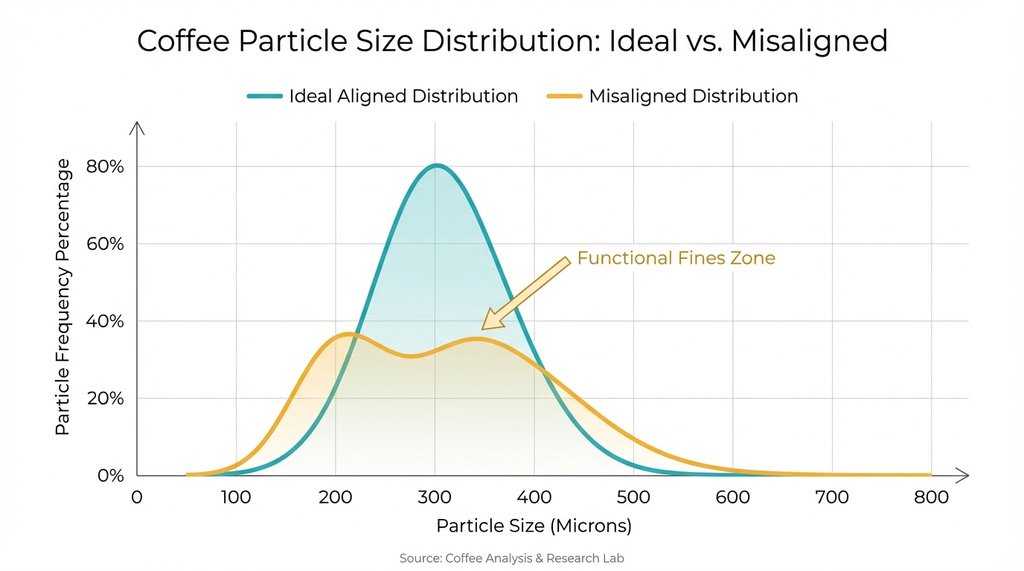
The frustrating thing about burr misalignment is that it doesn’t produce a consistent, identifiable failure. A grinder with significant radial misalignment — where the burr carrier is off-center relative to the burr chamber axis — will produce a particle distribution that looks nearly normal on a Kruve sift. You’ll see a reasonable bell curve. But what you won’t see without a more granular sift is the bimodal shoulder in the 200–350 micron range that shows up when one section of the burr set is running slightly closer than the other.
That shoulder is the problem. A certain percentage of particles are being ground at a tighter effective gap than the rest, and those fines — not the classic sub-75 micron fines, but what I’d call “functional fines” in the 150–250 micron range — migrate toward the center of the puck during distribution and extraction, creating preferential flow paths.
I spent a long time not understanding this because I was thinking about fines generation as a function of burr sharpness, not burr geometry. Both matter, but in opposite ways at different brew ratios.
Diagnosing the Problem: What Actually Works and What Wastes Your Time
The marker test is the standard starting point, and it’s useful — draw on your upper burr with a Sharpie, reassemble, run a few grams through, disassemble and check the wear pattern. But I’ve found it’s a poor diagnostic for partial misalignment. A grinder can show an even wear pattern on the marker test and still have 0.1mm of axial wobble that only manifests under load. I learned this the hard way after declaring my alignment “good enough” based on a clean marker result, then spending another week convinced my tamping was inconsistent.
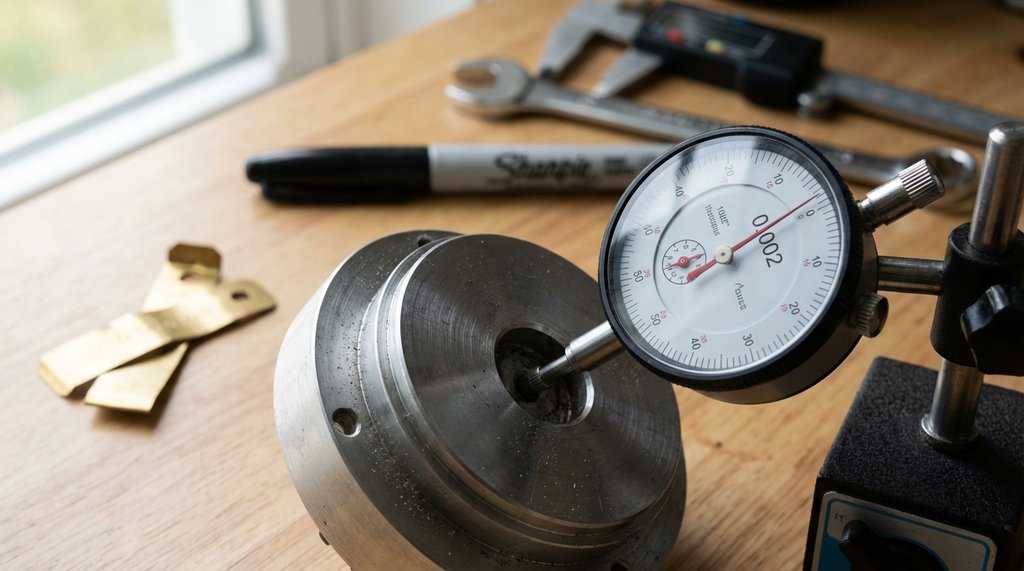
The more reliable diagnostic, at least for flat burr grinders, is the paper shim test with a dial indicator. You’re looking for runout on the burr carrier rotation. On the DF64 specifically, anything above 0.08mm of total indicated runout will produce extraction artifacts you can taste — I measured mine at 0.11mm before alignment work, and 0.03mm after. That delta is the difference between shots I’d serve someone and shots I was recalibrating around.
For conical burrs the geometry is different. Axial alignment is more critical than radial because the cone geometry is somewhat self-centering, but an upper burr that isn’t perfectly perpendicular to the shaft axis will produce a particle distribution skewed toward larger particles on one side of the gap. You’ll often see this manifest as a lighter extraction on one side of your basket — subtle, but visible in a properly lit bottomless portafilter.
The cheapest useful tool I’ve used for this is three-point shimming with 0.05mm brass shim stock cut into small tabs, placed between the upper burr carrier and the grinder body. It’s fiddly and requires patience, but it’s free relative to the Titus Alignment Tool or similar precision tools, which run around $150–200 depending on platform and burr size. I’ve used both. The Titus is faster and more repeatable; the shim method is more educational because you’re developing a tactile understanding of how small adjustments propagate through the assembly.
The Process That Actually Fixed My Problem
When I finally sat down to do this properly, I cleared a Sunday afternoon, which turned out to be necessary.
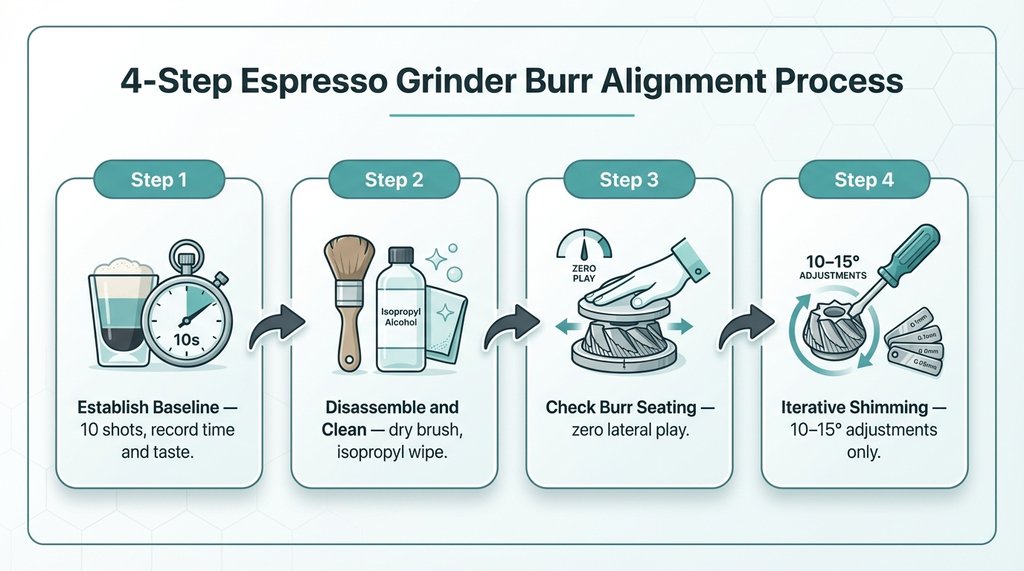
Step 1: Establish a true baseline. Pull 10 shots at your target recipe and record extraction yield with a refractometer if you have one, or at minimum record taste descriptors, shot time, and visual flow pattern. Don’t try to align until you have a clear picture of what “bad” looks like, because alignment work can introduce different problems and you need reference data.
Step 2: Disassemble completely and clean. This sounds obvious but I always skip it until I regret it. Any coffee oil residue or grinds lodged in the burr carrier interface will give you false tactile feedback during alignment. Clean with a dry brush, then isopropyl on a cotton pad for the carrier surfaces.
Step 3: Check burr seating before assuming alignment is the problem. On grinders where the burr locks to the carrier with screws (the EK43 is notorious for this), the burr itself can shift slightly under load. If your lower burr has any play — even a fraction of a millimeter of rattle when you apply lateral pressure with a finger — address that first. You cannot align a grinder whose burrs aren’t rigidly fixed to their carriers.
Step 4: The actual alignment. I do this iteratively rather than trying to calculate the perfect shim thickness in one pass. Start with the upper burr only, verify it’s concentric and perpendicular using either the dial indicator method or a quality straight edge across the burr face. Then reassemble with a single sheet of standard 80gsm printer paper (especially critical when dialing in a freshly roasted single-origin) as a starting shim (roughly 0.1mm) at the suspected high point, run the marker test again, and check the result.
On the DF64, the relevant adjustment points are the three screws on the upper burr carrier. Adding ultra-thin shims under the burr and fully tightening the screws is the correct approach. Not leaving screws partially backed off. The geometry is sensitive enough that coarse adjustments overshoot consistently.
The Non-Consensus Part That Most Alignment Guides Skip
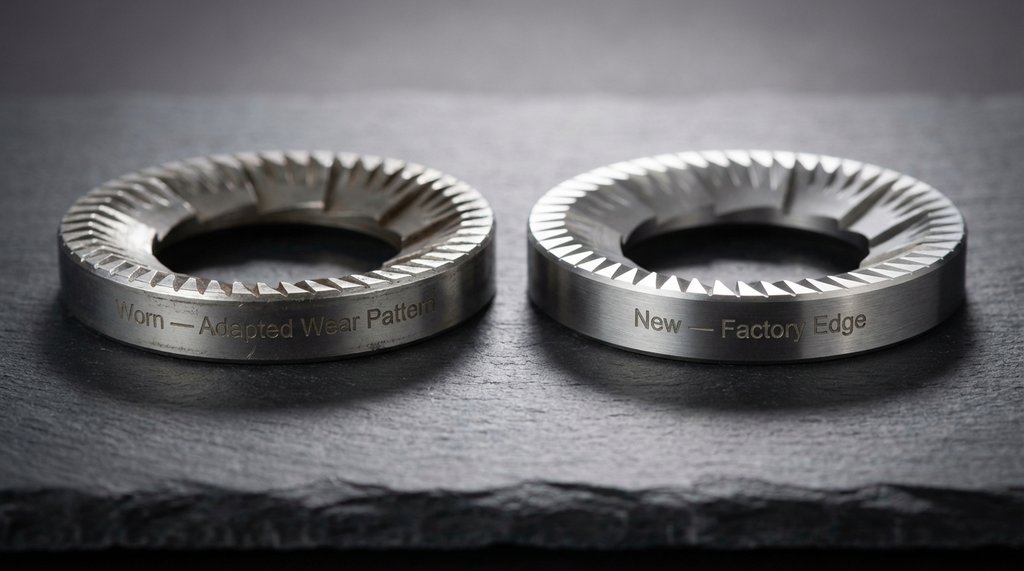
Here’s something I didn’t see discussed much until I started talking to people who’d actually tested this rather than just reading about it: chasing perfect alignment on a worn burr set is mostly pointless, and in some cases actively counterproductive.
Worn flat burrs develop a preferential wear pattern that compensates for minor geometric misalignment over time. If you have a set of SSP or stock burrs with significant hours on them, the actual ground surface has adapted to whatever alignment the grinder was running. Realigning those burrs to true geometric center disrupts the wear equilibrium and can temporarily worsen grind quality as the burrs re-bed to the new geometry. I’ve seen this take 200–400 grams of coffee to stabilize.
The practical conclusion is: alignment work should happen on new burrs or freshly sharpened burrs, not as a quick fix when an old burr set starts producing inconsistent results. If your shots are degrading after long-term stable performance, the burrs are probably worn and need replacement. Alignment won’t help.
Conversely — and this runs against another common piece of advice — I’ve found that tight factory alignment specs matter much more on lower-priced grinders than on high-end ones, because the lower-priced machines often have higher tolerance in the carrier machining. My first serious espresso grinder was a Baratza Vario. The factory alignment on my unit had about 0.15mm of radial misalignment, which sounds small until you realize the total effective gap for espresso is only around 200–350 microns depending on recipe. That 0.15mm represents a meaningful percentage of the total grinding geometry, which explains why Vario users see dramatically inconsistent puck resistance that doesn’t respond to recipe adjustments.
After alignment work on that Vario — specifically addressing the upper burr carrier wobble by adding a thin PTFE shim at the high point — my shot-to-shot timing variability dropped from ±4 seconds to ±1.2 seconds at the same grind setting and dose. That’s the kind of change that actually shows up in your cup.
When You’ve Aligned It and Still Have Problems
If you’ve done the alignment work thoroughly and are still seeing channeling or inconsistent extraction, the next place to look is the burr geometry itself — specifically whether your burrs are compatible with your workflow.
Unimodal-cut burrs like the SSP MP (Multipurpose) produce a narrow particle distribution that’s very sensitive to alignment errors, more sensitive than the stock burrs they replace. I made the mistake of installing MP burrs on a grinder that hadn’t been properly aligned and assumed the poor extraction was a recipe issue. It wasn’t. The tight distribution meant that the small percentage of off-spec particles from the misalignment contributed proportionally more to extraction variance than they would have with a wider-distribution burr.
Alignment also interacts with retention. Grinders with high retention (anything without a significant exit chute angle) accumulate a buffer of ground coffee between burrs and portafilter. If that buffer contains particles from a range of alignment states — because you adjusted something mid-workflow — you won’t see the effect of the adjustment until that buffer has flushed. This can create the impression that your alignment changes “aren’t doing anything,” when really you’re just pulling shots ground before the adjustment cleared.
The cleanest way to test this is to grind and discard 10–15 grams before pulling a test shot after any adjustment. It wastes coffee, but it’s the only way to get clean feedback.
Practical Summary of Tools and Numbers Worth Knowing
For anyone working through this systematically:
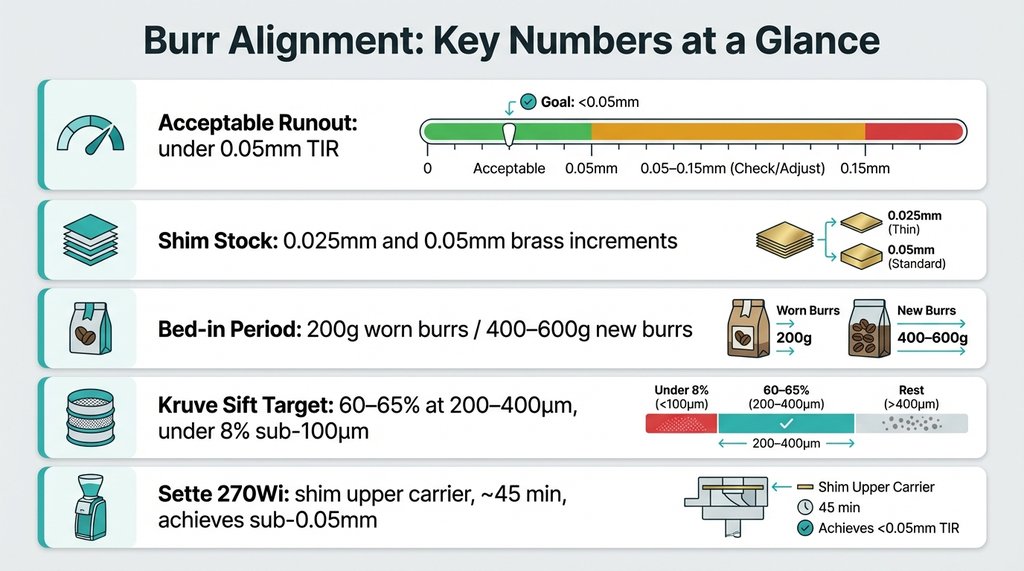
- Acceptable runout on a flat burr carrier: under 0.05mm TIR for high-demand espresso applications; most stock grinders come in at 0.08–0.15mm
- Shim material: brass shim stock in 0.025mm and 0.05mm increments is sufficient for most adjustments; available from metalworking suppliers for a few dollars per sheet
- Bedding-in after alignment: budget 200g on worn burrs, 400–600g on new burrs before evaluating results
- Sift diagnostic: a three-sieve Kruve setup at 400/200/100 microns will show you whether your distribution has the bimodal signature of alignment issues; target for espresso is roughly 60–65% in the 200–400 micron range with under 8% at sub-100 microns
- Baratza Vario specific note: the upper burr carrier can be shimmed at the retention points; there’s a documented process on Home-Barista.com (often called the Alicorn alignment) that takes about 45 minutes and consistently produces sub-0.05mm results
None of this is a substitute for dialing in your actual recipe once the grinder is properly aligned. But you can’t dial in a grinder that’s working against itself at the burr geometry level. Get the alignment right first, then chase the recipe.
8 thoughts on “Fix Coffee Grinder Burr Alignment for Better Espresso”