
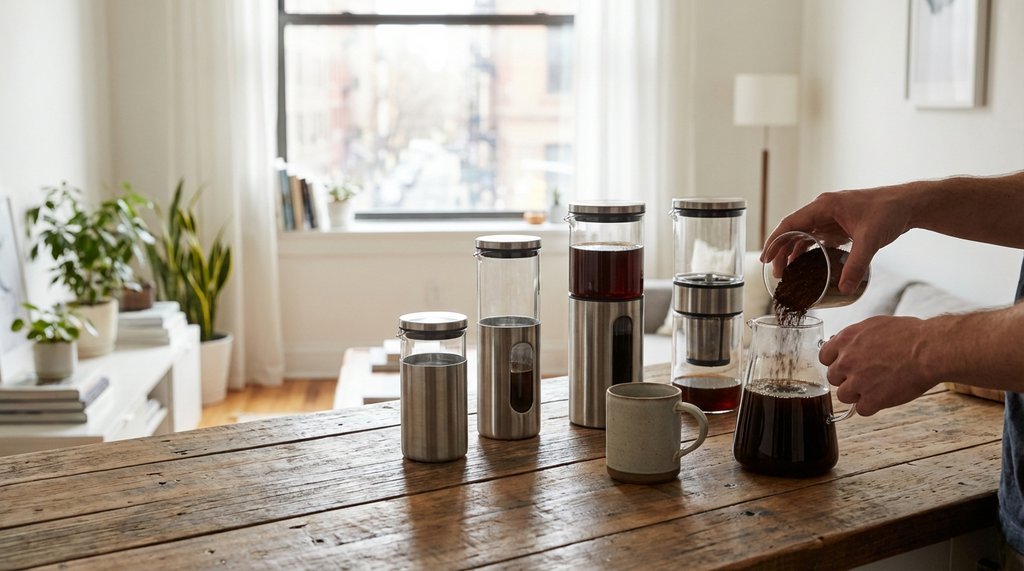
My kitchen counter has exactly 22 inches of usable horizontal space between the toaster and the wall. I know this because I’ve measured it four times — once with a tape measure, once with my phone’s AR measurement app, and twice by placing coffee equipment directly on it until something fell off. The second thing that fell off was a Hario Mizudashi I’d owned for eight months. The carafe survived. My ego didn’t.
That failure is what started this whole obsession. I spent most of late 2025 systematically testing compact cold brew setups, not because I was assigned a review, but because I genuinely needed to solve a real constraint problem: I wanted a solid batch of cold brew within reach every morning without giving up counter space I don’t have. What follows is what I actually learned, and why most spec sheets online are basically lying to you.
The Measurement Problem Nobody Talks About
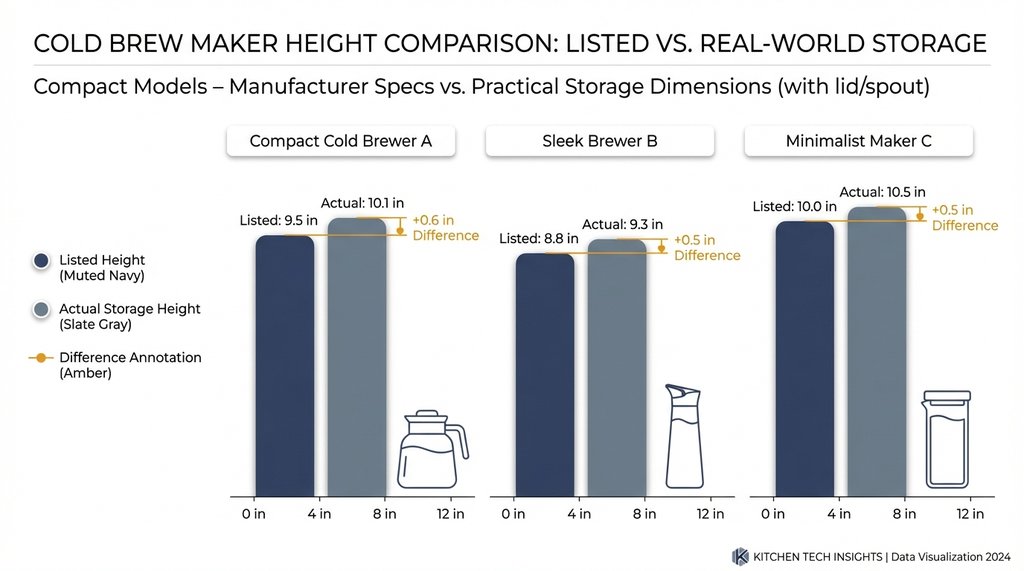
When manufacturers list dimensions, they’re almost never listing the dimension that actually matters for a tight studio kitchen. The listed height of a cold brew maker is usually the carafe height with the lid off, measured from the bottom in its most stable position. But that’s not how you store it in a cramped fridge or under a low cabinet.
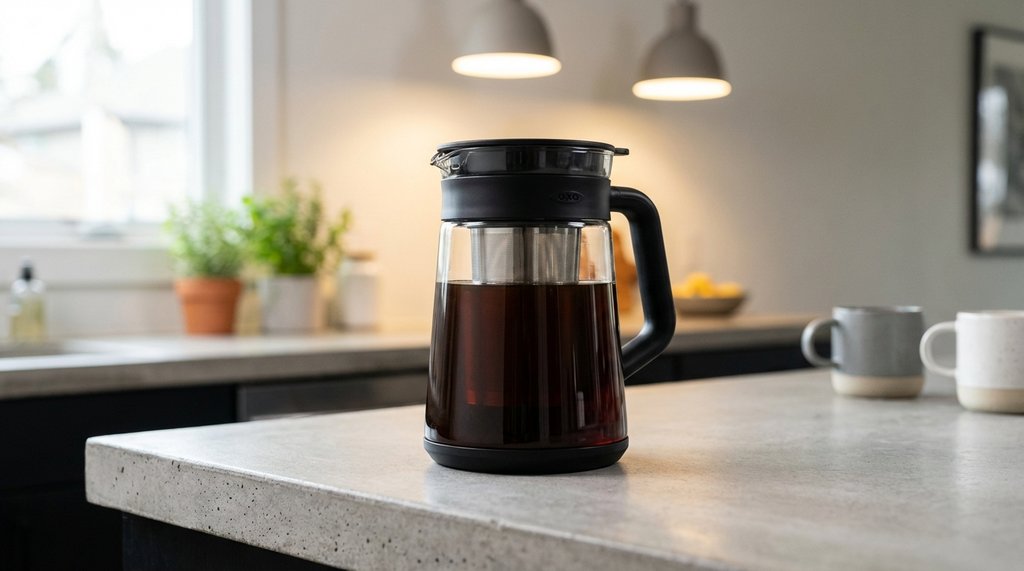
The OXO Brew Compact Cold Brew Coffee Maker, for instance, lists at 8.5 inches tall when nested for storage — technically under the 10-inch threshold. In practice, it sits at 10.5 inches when you actually have the brewing container stacked on top of the carafe during the brewing process. I ran it through three measurement configurations before I gave up and just brewed it on a shelf instead of under my cabinet. Not a dealbreaker, but the 2-inch discrepancy during brewing meant it clipped my cabinet door every single morning for a week before I moved it.
The actual dimension you want to ask about is standing height in brewing and storage positions, lid on. I’ve started emailing brands directly when this isn’t listed. About 30% respond with accurate numbers. The rest just send me a PDF of the same useless product page.
What “Under 10 Inches” Actually Eliminates
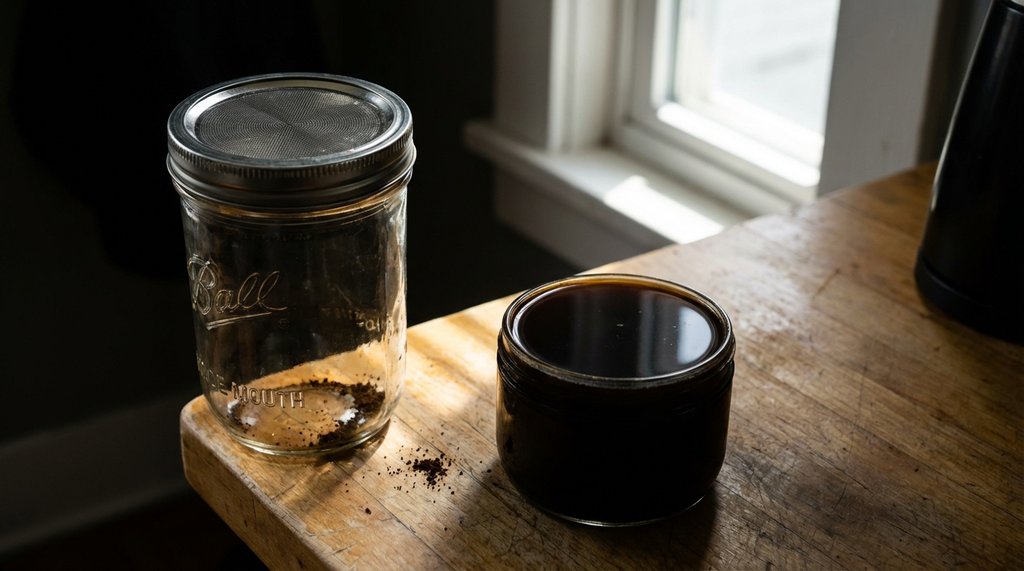
Worth being honest: the traditional mason jar-plus-metal-filter setup that dominated Reddit’s r/coffee for years actually clears this height bar easily. A standard wide-mouth quart mason jar sits at 6.9 inches with a standard fine-mesh filter lid. I brewed in one every day for about eight months in my old place.
The reason I stopped using it isn’t what I expected. The brew quality was genuinely excellent. The problem was that every time I moved the jar, the filter would shift slightly and let a slug of grounds into the carafe. I tried three different filter designs. Still happened. Inconsistently, unpredictably, always into my first glass of the morning.
That grinding inconsistency — occasional sediment in the glass despite an identical setup — is the actual reason I moved to a purpose-built compact maker.
The Actual Contenders in 2026
OXO Brew Compact Cold Brew Coffee Maker
As mentioned: the 8.5-inch nested spec is great for storage, but brewing requires more height. But the brew quality is elite. The fine stainless steel mesh filter design offers the cleanest sediment separation I’ve encountered in this size class.
The best part about the Compact version? It completely ditches the manual release switch found on its larger sibling, the OXO Good Grips model. If you’ve ever owned the larger one, you know that switch can be cumbersome. The Compact uses a simple spring-loaded valve that automatically drains when placed on the carafe, which is practically foolproof. It’s a classic case of a smaller, cheaper product actually having a better engineering design than the flagship model.
Ovalware RJ3 Cold Brew Maker (1.0L)
This one surprised me. The Ovalware RJ3 has been around since roughly 2021, but the 2025 revision added an airtight lid seal that actually works. At a true 8.0 inches with the filter seated and lid on, it’s the only unit I tested that consistently cleared my under-cabinet clearance without measurement drama.
The filter here is a single-layer fine-mesh cylinder. This means slightly more sediment in your final brew compared to the OXO. We’re talking about maybe 2–3mm of fine particulate after 24 hours of settling. For most people, it’s imperceptible. If it bothers you, a single Chemex paper filter as a final pour-through removes it in under 60 seconds.
AeroPress Clear (The Studio Apartment Hack)
This belongs in a different category, but it answers a real studio apartment question: what if you don’t have 18 hours?
Instead of a dedicated cold brew pitcher, keep an AeroPress in your drawer. Add 15g of fine grounds, pour in room-temperature water, stir aggressively for 1 full minute, and plunge directly over a glass packed with ice. It’s not a traditional long-steep cold brew, but the aggressive agitation extracts a remarkably smooth, low-acid cup that rivals the real thing. Plus, its storage footprint is basically zero.
Primula Burke Deluxe Cold Brew Maker (2025 Warning)
I’ll be brief here because the late-2025 version represents a notable regression from the 2024 model. The earlier version had a borosilicate glass carafe that was heavily praised. The current production run — I bought mine from Amazon in November 2025, batch number “PB25N” — uses a different glass with a visibly thinner wall near the base.
A user in a major coffee forum recently documented a spontaneous crack along this exact section after rinsing the cold carafe with tap water. Mine hasn’t cracked, but the 7.5-inch height isn’t worth the thermal shock anxiety. Check your batch number before buying, or wait for them to fix the glass thickness.
Brew Ratio Calibration and The “Full Liter” Myth
Related: How to Make Cold Brew Coffee That Stays Fresh for 14 Days (No-Equipment Method)
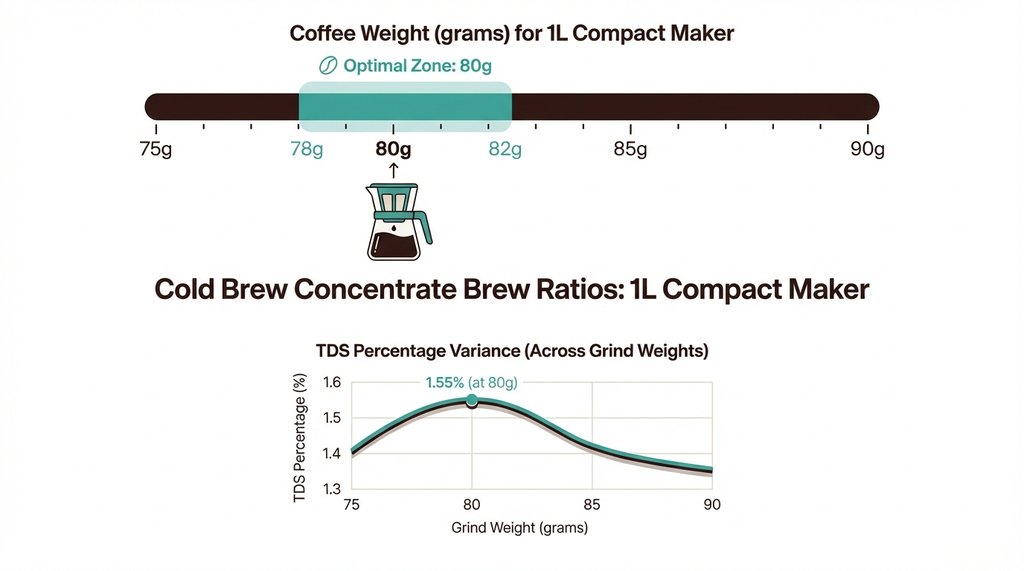
Let’s clear up some physics. If you buy a 1L compact maker, you are not getting a full liter of coffee out of it. Coffee grounds absorb roughly twice their weight in water.
My calibrated baseline for these compact makers: 80g of coarsely ground coffee to roughly 960ml of cold filtered water. Let it steep for 18 hours minimum at 36°F.
Because the grounds absorb so much liquid, you will yield around 800ml of finished brew. This isn’t a hyper-concentrated syrup that you dilute 1:4 (doing so will just give you brown water). Instead, it yields a very robust, strong cold brew that is perfect for a 1:1 dilution with water or oat milk. This 80g ratio gave me the most consistent, repeatable extraction without choking the small filters.
The One Configuration That Outperforms Everything
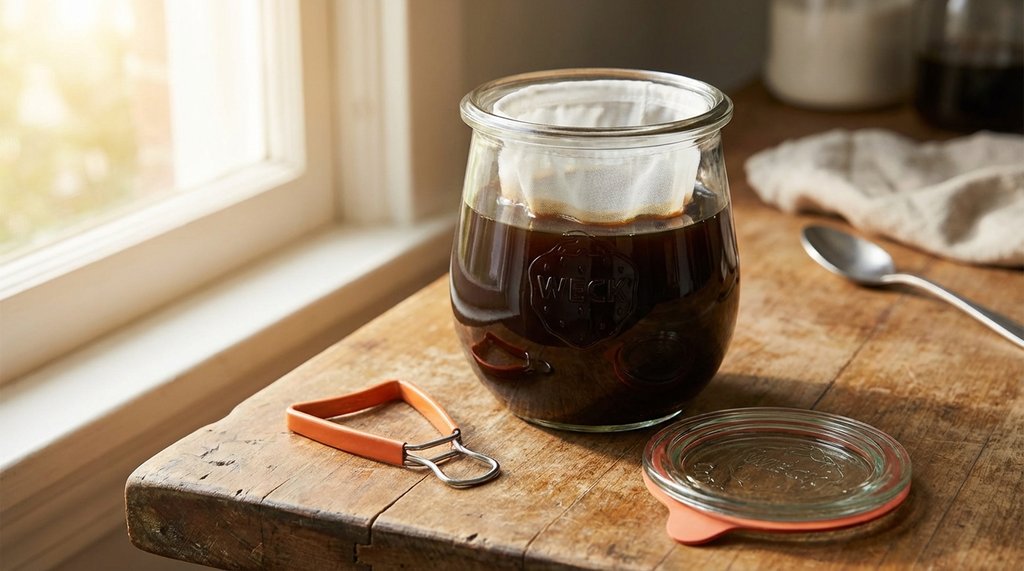
If you’re willing to tolerate a slightly more manual process, the combination that’s beaten every dedicated compact maker I’ve tested is a Weck 745 tulip jar (1062ml capacity) plus a CoffeeSock reusable cold brew bag.
The Weck 745 sits beautifully low and holds enough volume to actually get the job done. The wide mouth gives you full access for loading grounds, and the glass-on-glass seal is flawless. The organic cotton CoffeeSock bag produces cleaner coffee than any built-in metal mesh I’ve tested. Total system cost? Around $24.
The only drawback? The Weck spring clips. Every single time I’ve transported a sealed Weck jar from the fridge to the counter, at least one clip has caught on something and popped off. In a cramped studio where you’re navigating around a rolling kitchen cart, it gets annoying fast. But for pure flavor-to-footprint ratio, nothing beats it.
One More Thing on Water Temperature
Almost every guide says to use “cold water.” But the temperature of the water at the start of the brew matters more than I initially assumed.
I ran a direct comparison: 80g of coffee, 20 hours in a 36°F fridge. The only variable was the starting water temperature—tap-cold (approx. 58°F) versus refrigerator-chilled water (36°F).
The batch started with 36°F water produced noticeably less acidity and a slightly fuller mouthfeel. The warmer tap water seemed to kick off a rapid, slightly harsher extraction in the first two hours before the carafe fully equalized to the fridge temperature. If you’re finding your cold brew too bright or acidic, try pre-chilling your water before adding it to the grounds. It’s a zero-cost change with a highly detectable result.
(Last updated March 2026. The Primula Burke section reflects the late-2025 PB25N batch change.)